In diesem Video zeige ich, wie man wxWidgets mit Hilfe von Homebrew auf macOS installieren kann.
Eine kurze Zusammenfassung:
/bin/bash -c "$(curl -fsSL https://raw.githubusercontent.com/Homebrew/install/HEAD/install.sh)"
brew install wxwidgets
brew install dylibbundler
So sieht es dann aus:
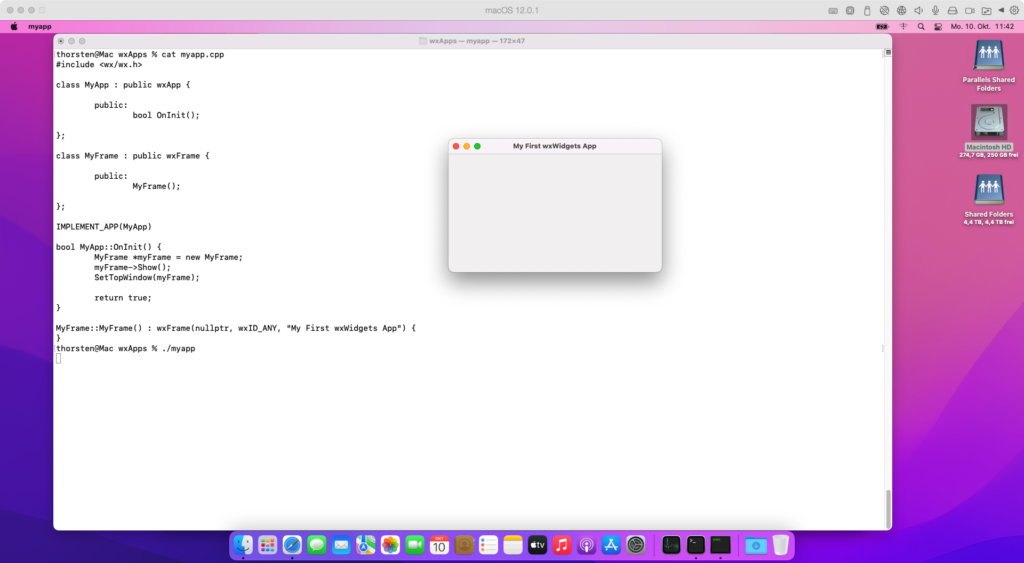
Hier noch der Programmcode zum Testen:
#include <wx/wx.h>

class MyApp : public wxApp {

	public:
		bool OnInit();

};

class MyFrame : public wxFrame {

	public:
		MyFrame();

};

IMPLEMENT_APP(MyApp)

bool MyApp::OnInit() {
	MyFrame *myFrame = new MyFrame;
	myFrame->Show();
	SetTopWindow(myFrame);

	return true;
}

MyFrame::MyFrame() : wxFrame(nullptr, wxID_ANY, "Meine wx-App") {
	wxStaticText *staticText = new wxStaticText(this, wxID_ANY, "Hello World");
}
Kompiliert wird das ganze via:
c++ *.cpp -o mywxapp -std=c++11 `/usr/local/Cellar/wxwidgets/3.2.0_1/bin/wx-config --libs --cppflags`
Wer wxWidgets auf macOS selbst kompilieren möchte, findet hier eine Anleitung.